


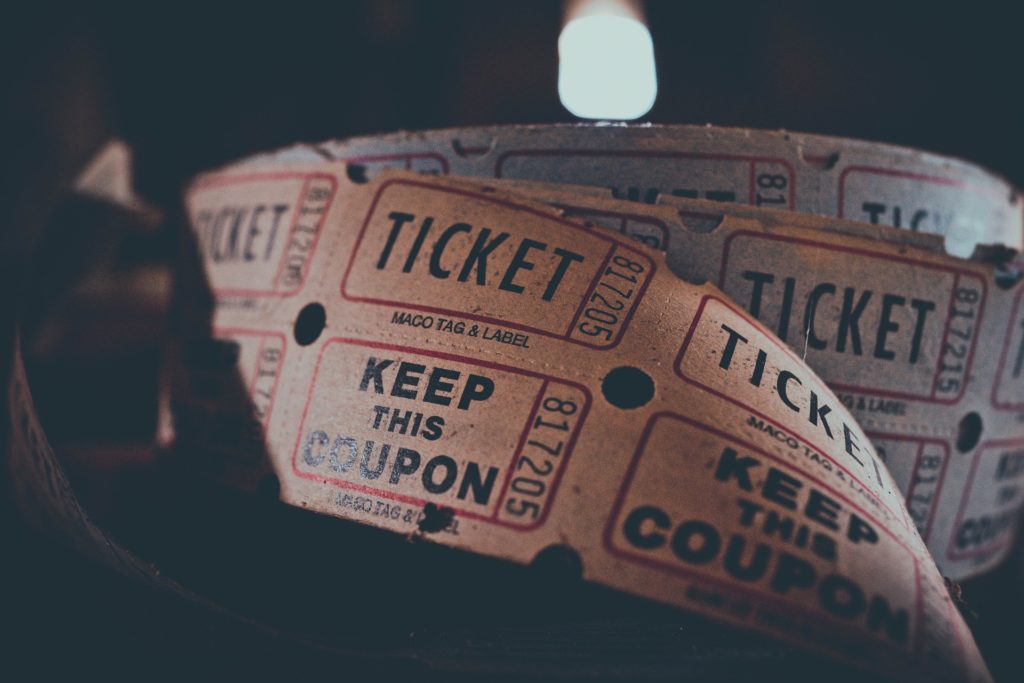


Every good party has a theme that stays consistent throughout everything. Plates, streamers, cups, and even the food are on theme! Buying all of those materials can get very expensive, especially for the average student.
One thing that can help with the cost, and add a little bit more soul to everything, is some D.I.Y. (Do It Yourself) power. Prepared for you are several tutorials from several categories to help make your party the best that it can be.
Go into these tutorials with your theme in mind. Whether you choose an aesthetic, holiday, or tv show for your theme, you need to decide how to incorporate it with these tutorials. A simple idea is using colors, patterns, or simple doodles that are associated with your theme. Examples of how to incorporate your theme will be provided.
Invitations
One of, if not the most, important parts of your party will be the invitations. Without a simple invite nobody would know when, where, or if to show up.
Writing your invitations
To make sure your guests arrive on time, you’re going to want to send them invites. It may sound simple, but making sure your guests understand can be difficult. These are some steps that can help you keep invites clear and concise:
1: Make your guest list
While this step sounds obvious, it’s one that can easily be forgotten. You want to make sure you invite everyone you want to be there. It would be terrible if you forgot to make an invitation for someone.
To avoid that, write out your list. You can do it on paper or digitally. Make sure you review it multiple times, just to make sure you have everyone you want on it. As you make invitations, be sure to check them off of your list.
2: Keep it simple
Writing a personal invitation with a paragraph of your love for the person you’re inviting sounds wonderful. It also sounds unrealistic. You need to plan your party, and writing a personal soliloquy to everyone you know is only going to make you tired.
Instead, make it simple. Include what’s being celebrated, the time and place of the party, and if you’re feeling fancy you can add their name.
3: Writing on the envelope
Unless you plan on delivering each invite by yourself, you’re going to have to write down the address of your invitee on an envelope.
Templates for writing can easily be found online or below. 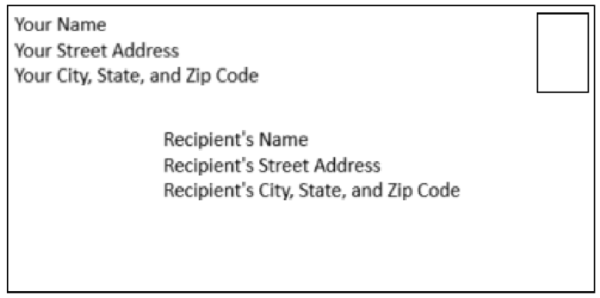
4: Consider printing
If you plan on sending invitations to a lot of people, you may want to print your invitations with a printer. There are many programs that you can create an invitation in, or you can even scan in a handmade one to print. If you don’t have too many people or are planning a simple invitation design, then you may be up to the task of making each one by hand.
Tips for decorating
Whether you decide to make an invitation on paper or a computer, you’ll want to make it pretty. Part of making it pretty will be making it fit with the rest of your party.
Nobody can give you a step-by-step guide to creativity, but you can get some general pointers.
- Use Highlighters to make a border on your invite that’s sure to pop!
- Use patterns to help fill up blank space
- Try to stick to a color palette with 2-3 main colors for a cohesive look
- Add some stickers.
D.I.Y Stickers (Opaque & Clear)
Stickers can be a fun way to add some pizzazz to an invitation. You can use them for sealing the envelope, filling up space, or even as a small little gift inside. Normally you would use sticker paper to make your own stickers, but that can get expensive. This method takes materials you may have in your own home to create stickers.
For Opaque stickers you need:
- Parchment Paper
- Packing tape
- Your own drawings or pictures from a printer
- Scissors
- Plan your stickers
Decide how many stickers you want to make and of what. Try to keep in mind how much space they’ll take up.
- Rip out parchment paper and place tape over
With the size of all your stickers in mind, rip out a piece of parchment paper. Take your packing tape and apply it over top of the paper liberally. Press the tape down firmly.
- Place drawings/pictures over parchment paper
- Tape over the drawings/pictures you placed down
Press the tape down firmly once more.
- Cut out your stickers
With your scissors, cut the pictures out in whatever way you prefer. You can cut them around their borders, or into a square or circle.
For Clear Stickers you need:
- Parchment paper
- Packing tape
- Pictures from an Laser printer
- A bowl of water
- Scissors
- Plan your stickers
Decide how many stickers you want to make and of what. Try to keep in mind how much space they’ll take up.
- Print out your pictures
For clear stickers, you must print out pictures using an Laser printer. Inkjet printers will not work for this craft.
- Place tape over pictures
- Cut out taped-over pictures
- Place pictures in water
You’ll want the pictures to soak for around 5-10 minutes or until paper starts to peel off for the best results.
- Gently rub paper off from tape
Use your fingers to rub off the paper in a swirling motion. Make sure to rub off every piece of paper to make the final sticker look the greatest.
- Leave stickers to dry
- Tear out Parchment Paper and place tape on top
With the size of all your stickers in mind, rip out a piece of parchment paper. Take your packing tape and apply it over top of the paper liberally. Press the tape down firmly.
- Place clear stickers overtop of taped portion of Parchment Paper
- Cut out your stickers
With your scissors, cut the pictures out in whatever way you prefer. You can cut them around their borders, or into a square or circle.
Food
Snacks and sweets are perfect for nearly every occasion, including parties. The only thing better than store-bought sweets are the ones you make yourself, especially because you can control how they’ll look in the end.
3-ingredient cake mix cookies
This simple recipe won’t take up too much of your time and yields around 20 cookies a batch. With how simple it is, you can add several of your own twists to create something perfect for you.
You will need:
- 1 box of Cake Mix (any flavor)
- ½ cup of Oil
- 2 eggs
- A mix-in such as chocolate chips or nuts (optional)
- Preheat oven to 350 degrees Fahrenheit
- Combine all ingredients in a large bowl
- Roll dough into small balls and place on baking sheet
In my experience, using parchment paper on a baking sheet yields the best results.
- Place in oven for ~10 minutes
- Take out and leave cookies to cool
Sugar Cookies – a simple decoration guide
A sugar cookie is a delectable bundle of sugar that can take a while to prepare but can also be cut into fun shapes. Many recipes take an hour or more, and afterwards you still have the decorating to do. I recommend this recipe submitted by J Saunders to allrecipes.com
If you want to have cookies that look nice, you may be tempted to find some cookie-cutters that are on theme. Aside from the issue of price, you may never use those strange shapes of metal again. That’s why I recommend getting only one shape, a circle.
A circle is simple. It can be a flower, a smiling face, or just a space to write a word or two. Here are some general tips for decorating homemade sugar cookies for your celebrations:
- Make sure your cookies are cooled before decorating with icing
- Stick to your themes color palette
- Use simple patterns
- Reuse designs instead of making each cookie unique
- Try writing names or words if you aren’t confidant with art
Miscellany
The last tutorials didn’t fit into any other category very well, so they belong to the category of miscellany.
Posters
Getting a poster printed professionally comes with several hurdles. Some companies will have strict rules for the posters they print, and the headache is rarely worth the price.
If you’re fine with the quality of your own printer paper, then printing a poster yourself will be perfect for you. These posters aren’t just an image stretched to fit a standard 8.5×11 piece of paper, these posters will take up multiple pages and must be taped together into one large poster.
Several websites exist for creating your own printable posters. I recommend the website Rasterbator (coming from the German word Raster, meaning to screen) for a free option, or the website BlockPosters for a paid option.
Regardless of the website you use, the process will remain largely the same. Upload your image, select how many pages you would like it to take up, print the PDF provided by the website, and tape it together. If you have any further questions, please check the website of your choice.
Party Playlist
In our modern day and age, making a playlist is easier than ever. With programs like Spotify and iTunes, you can make a playlist available in multiple places.
There’s no one-size-fits-all way to make a playlist. That being said, here’s some general tips:
- If you want your guests to sing along, choose songs they’ll know
- Try to have a mix of different artists
- Never have the same artist play twice in a row
- Have an overall genre that fits your theme
- If you want to, you can put your playlist on CD
D.I.Y. Bracelet
This simple craft is great for all ages! It can make a nice activity to do with friends, or can act as a small party favor.
All you need for this is:
- String
- Pony-beads
- Scissors
Arrange beads on string in whatever order you desire. The average size will be around 28-32 beads.
To tie off your bracelet, make 2 small double knots.
Enjoy your Party!
If you don’t have access to a printer, I suggest going to your local library. Many libraries offer printing services for a small fee. Other materials mentioned can be found in local convenience stores as well.
With all that in mind, have a nice party.